Sunday, 16 August 2015

Did someone call a Doctor?


Summer 2015 has been the year my elder sister has graduated from university having studied medicine for a long and hard six years. She has worked for it and deserves to be where she is today. So in celebration of her graduation I decided to have a first time go at decorating a themed cake with fondant icing. You can take a good guess at what the theme is (Doctor!)

Having not ever really given my hand to decorating with fondant icing before, it took a good couple of hours to complete the cake before I was happy with it. The key to it, is practice, patience and the ability to keep up with cleaning your mess along the way - or it could look a bit of a bomb site by the end, unless you can work well with those conditions, then go ahead without the cleaning!

In the past from growing up and having fondant covered cake, the cakes have always been your typical vanilla sponge with some butter cream and jam. I am not really a fan of these plain cakes and I felt I was eating the cake for the sake of the occasion. I want my baking to be enjoyed and to be people to be asking for the recipe and wanting more, not taking the piece home in a napkin to leave in the cupboard and throw away the next day.

So with this cake, I was unable to bake a chocolate cake because my Mum suffers from migraines and chocolate is a trigger. I asked my dad for a bit of advice as he too would be eating it and he suggested something in relation to the dessert of sticky toffee pudding (which my sister LOVES). After some searching, I came across the recipe Gloriously Sticky Toffee Cake by Miranda Gore Brown. This cake came out perfectly and with the butter cream icing and the fondant icing tasted a great combination.

Where is this cake you ask... 

tah dahhh


You can find the recipe for the Sticky Toffee Cake here : Recipe

Until next time bakers!


Friday, 26 June 2015

Oat, Date and Dark Chocolate Cookie Recipe


I've lost count of the weeks since I last posted, I have my reasons so please forgive me, with the end of second year at uni and deadlines followed by moving back home, I've not been able to give the time needed to create such mouth watering recipes. But better late than never! 


A pre weekend post this time, here are: 
Oat, Date and Dark Chocolate Cookies


They are the perfect cuppa parter! 

I have put in dark chocolate, however you could use milk chocolate if you prefer. The oats give it that added texture and 'oatiness' to every bite,whilst the dates give a fudgey like flavour and the chocolate, well... it's chocolate! 


As my blog name 'Fashionable Bake', I started out for it all to be on baking; cakes, biscuits, tarts, cupcakes etc. But I do enjoy to cook and I do a fair amount of it. I will start to post blogs and recipes for main meals, sides, savoury snacks etc. to add some variety to my blog!


Enjoy!

Instagram - fashionablebake


Ingredients

  • 80g Dark muscovado sugar (or any brown sugar)
  • 120g Butter (room temp)
  • 1 Egg
  • 1 Tsp Vanilla extract
  • 100g Oats
  • 75g Wholemeal Flour
  • 100g Pitted dates (chopped)
  • 100g Dark chocolate (chopped or chocolate chips) 


Method

  1. Preheat oven (fan) to 180 Degrees C.
  2. Line and grease 2 baking trays. (Enough for 15-18 cookies)
  3. Cream together the softened butter and sugar in a large mixing bowl.
  4. Whisk in the egg and vanilla until all the mix is combined.
  5. Add in the oats, weigh out the flour and sift in to the mix.
  6. Chop up your dates and chocolate (unless using chocolate chips) into whatever size you like. Add to the mix and stir until combined. 
  7. Using a metal tablespoon and teaspoon, spoon about a tablespoon onto your baking tray, allowing about 2 inches between each cookie. Once you have spooned all your mix onto your trays, with a fork press down the cookies as the oats hold structure so the cookies won't spread whilst cooking.
  8. Place cookies in the oven, after 5 minutes take out and press down again with a fork if needed. 
  9. Allow to bake for a total of 12-14 minutes until golden.
  10. When out of the oven, leave to cool on wire racks (or you could eat them whilst they're still warm and the chocolates still melted!)

Instagram - fashionablebake


Sunday, 24 May 2015

Rhubarb Crumble Recipe


Okay, I need to step my game up again... but I have valid reasons end of term = deadlines and exams. Coming home for the weekend I was a little unprepared regarding what to bake for the blog this week. So finding a blue bag in the fridge destined what to bake this week... in the blue bag was rhubarb. The rhubarb came from my grandparents garden (everyone *awhhh*) and after hearing the amazing 'Crumble song' from Britain's got Talent last week I had to go ahead and make a humble crumble! So this week it is of course 
Rhubarb Crumble!


The lyrics for the crumble song go a little like... 'everybody's good at cooking something, and I'm good at cooking crumble' so you can sing that to yourself and you too will be good at cooking crumble... so get cooking! 

Instagram - fashionablebake

I also added some jumbo oats into the crumble topping to give it some extra crunch and just because I like oats. I apologise for the very poor quality photos, I promise next week I will up my game!


So for a simple, easy and very affordable pud, here is the how to

Ingredients
  • 500g Rhubarb
  • 100g Golden caster sugar
  • 120g Self-raising flour
  • 40g Jumbo oats (optional, or any oats)
  • 50g Light brown soft sugar
  • 70g Butter

Method
  1. Wash and cut the rhubarb into small lengths and add to a pan with the sugar. 
  2. On a low heat stir until the sugar has melted.
  3. Place a lid on the pan and allow to simmer for 10-15 minutes until the rhubarb has softened but still holding its shape. 
  4. Pour the rhubarb into a medium sized baking dish.
  5. Preheat fan oven to 180 Degrees C.
  6. In a mixing bowl, add the flour and butter and rub together until you get a crumbly mixture. 
  7. Mix in the sugar and oats.
  8. Place on top of the rhubarb and cook in the oven for 30 minutes or until golden brown.
  9. Serve with your choice or custard, cream or ice cream! (Or on its own) 


Sunday, 17 May 2015

White Chocolate Brownies (Blondies) Recipe


I hope this week none of you were expecting too much of a healthy bake... as yeah it's really not healthy at all, but that's not to say you're not allowed it! Everyone is allowed a treat and to eat what they like in moderation, too much of anything can be a bad thing! 
So this week let's get straight to it, I have for you White Chocolate Brownies or as a lot of people call them 'Blondies' however, many of my friends have had to ask what blondies are... so I'm just going to stick with white chocolate brownies!


The photos don't do these much justice, I have had four pieces since writing this up... I think four? maybe five... definitely enough!! They are so fudge-y, buttery and chocolatey, you will not be disappointed when you try one! Just imagine your favourite fudge-y, chewy brownie... but tasting of white chocolate instead of milk chocolate. Now you want to bake them right?!


I doubt these are going to stay around for long, not with my consumption anyway... maybe another batch is in order! I hope you enjoy these as much as myself! 

Don't forget to check out my instagram and tag any of your bakes - @fashionablebake

Instagram - fashionablebake

Ingredients

  • 200g White chocolate 
  • 150g Unsalted butter
  • 150g Golden caster sugar
  • 2 eggs
  • 1/2 Tsp Vanilla extract
  • 1/4 Tsp Salt
  • 160g Plain flour
  • 50g White chocolate chips


Method

  1. Preheat a fan oven to 180 Degrees C. Line and greaseproof a baking tray (the one I used was 7 inches by 11 inches so anything near that is fine).
  2. In a pan, slowly melt the white chocolate and butter. 
  3. In a large mixing bowl, whisk together the eggs, sugar, salt and vanilla.
  4. Pour the melted butter and chocolate into the mixing bowl and whisk until combined.
  5. In a separate bowl weigh out the flour. Sift into the mixture and mix in. Once mixed, gently stir in the chocolate chips. 
  6. Pour the mixture into your baking tray and bake in the oven for 20 - 25 minutes (test with a cake tester or sharp knife)
  7. Allow the brownies to cool completely in the tray before cutting into pieces and eating!


Sunday, 10 May 2015

Oreo Cupcake Recipe


Hello again! I hope you enjoyed last weekend’s post of a healthier bake. It seemed to get a lot of appreciation on my social media channels. I do think I will be baking some healthier treats as I am into my fitness and healthy eating… but of course I do like to indulge in something that is not so healthy. So this week, I have taken an idea from when I have made these bad boy’s before but have created my own recipe for… 

OREO CUPCAKES!

If you bake these, don’t tell your friends what is in them and then you can call them ‘Oreo surprise cupcakes’ but as I’m giving you the how to then they won’t be much of a surprise to you!

These Oreo cupcakes are the perfect treat for any Oreo lover, even my flatmate who was never an Oreo fan has been converted!

Let’s take a little look…


A whole Oreo in the bottom, yes that’s right! Why not ey!? These are far from healthy, but oh my, they are yummy (if I do say so myself!) They are so simple to make, yet look pretty darn good!


So let’s break this cupcake down… We have a whole Oreo at the bottom, a tasty chocolate, moist sponge covered with Oreo biscuit butter icing and finished with half an Oreo. Can’t get much ‘Oreo’d’ than that! So if you fancy making these then here is the how to!

Enjoy!

Don’t forget to share your own bakes on Instagram and tag @fashionablebake!

Instagram - fashionablebake


Ingredients

Cupcakes (makes 12)
  • 125g Unsalted butter (room temp)
  • 125g Caster sugar
  • 2 Medium eggs
  • 1 Tbsp Milk
  • 100g Plain flour
  • 25g Cocoa powder
  • 1 ½ Tsp Baking powder
  • ½ Tsp Vanilla extract
  • Pinch of salt
  • 12 Oreos


Icing
  • 150g Unsalted butter (room temp)
  • 300g Icing sugar
  • Milk
  • Approx 100g of Oreo biscuits
  • 6 Oreo's halved for the top


Method
  1. Preheat a fan assisted oven to 180 degrees C.
  2. Line a cupcake tray with cupcake cases and in the bottom of each case, place an oreo.
  3. In a large mixing bowl, cream together the butter and sugar. A little at a time, whisk the eggs and milk in followed by the vanilla extract.
  4. In a separate bowl weigh out the flour, cocoa and sieve into the wet mixture along with the baking powder and salt. Fold until all the mixture is combined.
  5. Spoon the mixture into the cupcake cases, the mixture should fill the cases to about ¾ the way up.
  6. Place in the oven on the middle shelf for 15-18 minutes, when cooked a cake tester should come out clean and the cupcakes should spring back when pressed.
  7. Allow to cool before icing.
  8. For the icing, separate Oreos taking out the filling with a knife, you will need approximately 100g of Oreo biscuit
  9. Place the biscuits in a bag and bash with a rolling pin until you have fine crumbs (or you may use a food processor if you prefer) when you have your crushed Oreos, mix in to the butter and icing sugar.
  10. Pipe or spread your icing onto each cupcakes. Finish each cupcake with half an Oreo on the top (optional).


Instagram - fashionablebake


Sunday, 3 May 2015

Banana Coconut Cream Pie Recipe


May I introduce to you a HEALTHY(er) bake
(which is technically a no bake)...
Banana Coconut Cream Pie 


For those of you wanting a treat but not wanting all the added calories of sugar and ingredients you can’t actually pronounce, this is perfect for you! (As long as you like and can eat the ingredients that are used)

(I may add that the icing sugar isn't exactly healthy... but there's not a lot of it if you were to calculate it per portion)

Eating a ‘healthy’ labelled or 'low calorie' dessert doesn’t always mean it has actual health benefits or much in it that’s actually any good to your health. For example, if something is labelled ‘low fat’ then it’s probably got quite a few added teaspoons of sugar in instead to replace the taste of the fat taken out. So, yes you may not be consuming as many calories… but you’re consuming more sugar than something that hasn’t had the fat taken out, I won’t go into it but I’m sure most of you are aware that sugar is not something you want to be eating a lot of! (And something I’ve learnt myself over time is that fat is not all that bad for you as long as you’re eating the right fats and not the fats in processed foods)

So having said that, I will go through some of the ingredients in this bake and why they are better for you than the typical ‘low fat’ desserts you will find on the shelves in the supermarket!


Quark is such a great alternative to your regular soft cheese, it is low in fat and sugar! However it doesn’t have that creamy cheese flavour as your bog standard cream cheese but that doesn’t matter for this dessert as we are adding other flavours to it.

The dates and walnuts used for the base are a great alternative to a biscuit and butter base (and perfect for those gluten intolerant). Walnuts are packed with Omega 3 fatty acids and they contain antioxidants that boost heart health. Dates are rich in dietary fibre and are also an excellent source of iron and potassium.

Bananas, I’m sure you all know bananas are healthy but a few benefits you may or may not know. They too are a great source of potassium, they help with the production of white blood cells and can also help aid digestion.

Dark chocolate, yes that’s right CHOCOLATE! But in moderation, a couple of squares of dark chocolate is great for satisfying that chocolatey tooth! Dark chocolate contains antioxidants (the 70% cocoa + stuff), so the higher the cocoa content the better it is for your health… in moderation.


Ingredients
  • 100g Dates
  • 150g Walnuts
  • 300g Quark
  • 2 Tbsp Lemon Juice
  • 2 Tsp Vanilla Essence
  • 50g Icing sugar 
  • 60g Desiccated Coconut
  • 3 Ripe bananas
  • Dark chocolate for decorating(optional)

Method

  1. Soak your dates in a bowl of warm water for 10-15 minutes.
  2. Whilst the dates are soaking, line a cake tin (or you could use a baking tray) with greaseproof paper.
  3. Drain the water and add the dates and walnuts to a food processor and blitz.
  4. Once well blitzed, spoon out on to your tin/tray and even out with a fork and press down, place in the fridge.
  5. In a mixing bowl whisk the quark for 2-3 minutes. Then add the lemon juice, vanilla extract, desiccated coconut, one banana, icing sugar and whisk until all combined.
  6. Slice up the remaining two bananas and place on the walnut and date base.
  7. Pour the coconut mix on top, leaving a little room around the edges.
  8. Leave to set in the fridge for at least 3 hours.
  9. Finish with sprinkling on desiccated coconut and grated dark chocolate (optional). 


Instagram - fashionablebake


Sunday, 26 April 2015

Apricot and Almond Flapjack Recipe


I hope that now you are a committed Fashionable Bake reader, every Sunday has now become an exciting part of your life to see what is new to bake this week! (or not... which is totally fine *cries a little*) 

So the London marathon is taking place today, firstly a good luck to all the runners! This weeks bake, maybe could have been blogged a week in advance prior to the marathon (I don't actually know how many marathon runners if any are a Fashionable Bake reader)as flapjack is great for energising! 

On to this weeks bake: Apricot and Almond Flapjack
I partnered up with my older sister who is an a bit of an athlete herself, previously completed two marathons (round of applause please)! I say partnered... she baked the flapjack and I am now writing about it. I hope the lack of chocolate in this weeks bake doesn't put anyone off as it is super yummy, super scrummy, super delicious (and all other things super). 

Instagram - fashionablebake

(Apologies for the not so great quality of the photos, there was a slight camera/phone mishap which I won't go in to)

So lets take a little look shall we...


Who can say no to that golden, sweet, buttery goodness?!

If you answered correctly, here is the how to:

Ingredients


  • 250g Butter
  • 100g Soft brown sugar
  • 8 Tbsp Golden Syrup
  • 500g Oats (we used 250g rolled oats and 250g jumbo oats)
  • A good handful of dried Apricots (around 100g)
  • Handful of Almonds (around 75g)

Method


  1. Preheat your oven to 170 degrees C (fan oven).
  2. Line and greaseproof a large baking tray.
  3. In a large pan, slowly melt the butter, sugar and golden syrup. Once melted, bring the mixture up to the boil allowing to gently bubble for 2-3 minutes.
  4. While the mixture is bubbling, quarter the dried apricots and roughly chop the almonds.
  5. After the mixture has bubbled for a few minutes (the colour should have deepened to look a little like toffee) leave to cool for a further few minutes. 
  6. Whilst cooling, in a bowl weigh out your oats. We used jumbo oats to give a better texture and nuttiness. If you only have rolled oats, you may need to use less as they absorb more moisture.
  7. Once the mixture has had time to cool a little, stir in the oats, dried apricots and almonds.
  8. Spoon the mix on to your baking tray and spread evenly. Bake for 20-25 minutes until golden brown. 
  9. When cooked, cut or score into pieces whilst they are still warm to make it easier to cut and allow to cool.


Happy baking!

Instagram - fashionablebake


Sunday, 19 April 2015

Chocolate Bark


After some lovely weather recently, it finally feels like summer is in sight! Though British summer's are never really a proper sunny summer... unless we're lucky. But I've heard multiple times that we may be in for a 3 month heat wave? Say whaaaat. As long as it happens after my exams though, nothing worse being stuck in the library revising when it's sunbathing weather outside.

So as summer is approaching, that means possible bikini weather. Now I know all my past posts aren't exactly 'bikini bod' foods but this weeks bake is a little 'healthier' in a way.

Made with dark chocolate (the best for our health out of all chocolates, that does not mean go ahead and eat as much as you like, it is still chocolate) topped with seeds, nuts and berries it has added healthiness. So yes it may look healthier than a standard chocolate because of the trail mix but that does not mean it is healthy to eat the whole lot in one go.  


Chocolate Bark is this weeks recipe. It is so easy to make, even kids can do it providing supervision of the parents whilst melting the chocolate. 
It's a cheap, easy, quick and a delicious treat that anyone of any ability can make!
I can back up the delicious bit from my flatmate - 'ooh it tastes like something from hotel chocolat!' Now who's not going to want to make something that tastes like that!?


Ingredients
  • 200g Dark chocolate (or 400g all dark chocolate if you wish)
  • 200g Milk chocolate
  • 1 pack of trail mix (or any topping you wish)

Method
  1. Line a baking sheet with greaseproof paper. 
  2. Break the chocolate into two glass bowls, one for the milk and one for the dark.
  3. Melt the chocolate over a pan of hot water, or you can microwave it (in a microwavable dish) being careful not to burn it.
  4. When both lots of chocolate has melted, spoon alternately both chocolates randomly onto the baking sheet. 
  5. Then gently run a fork or knife to mix the chocolate so you get a marble effect. 
  6. Sprinkle with as much trail mix as you like.
  7. Place in the fridge and allow to set for at least an hour.
  8. Once set, break up into desired sized pieces.


Instagram - fashionablebake


Sunday, 12 April 2015

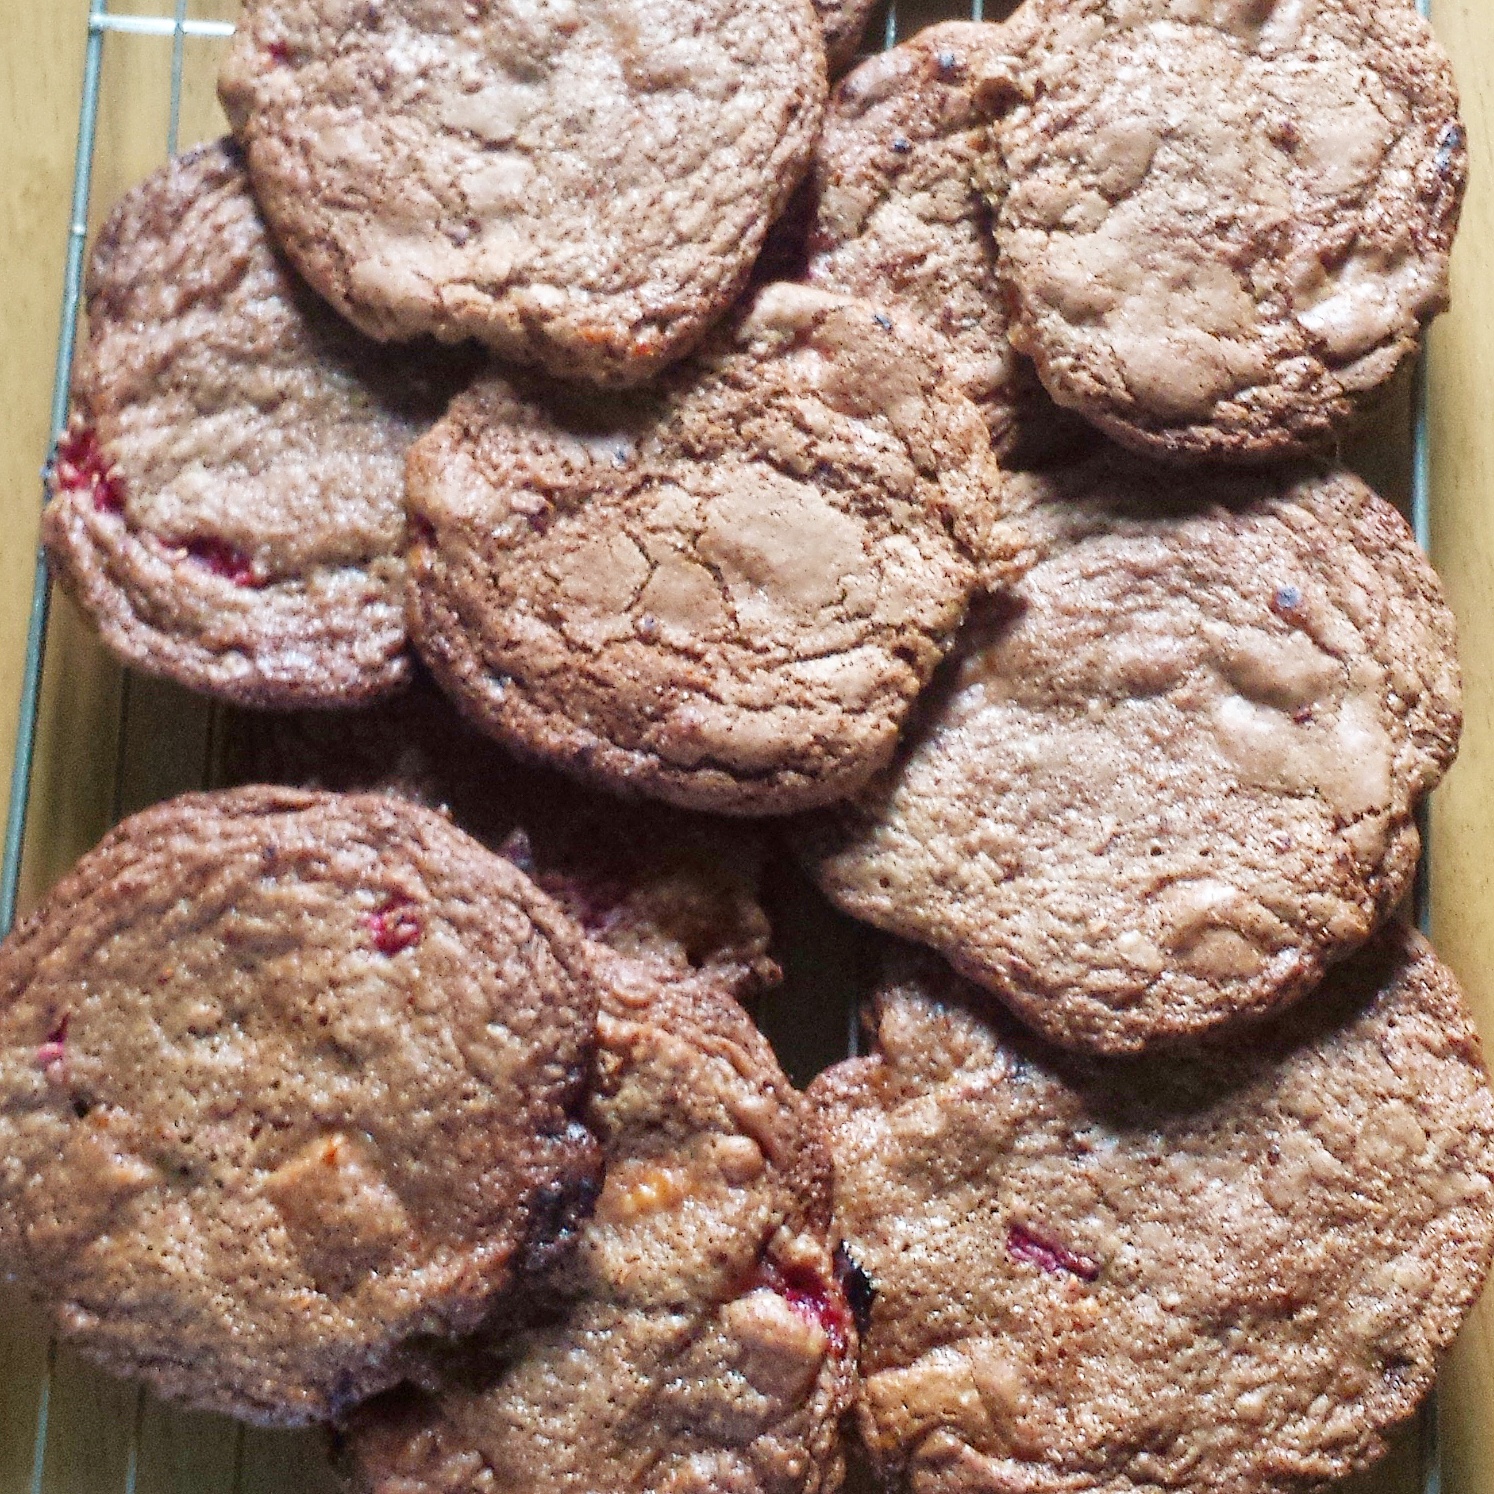
White Chocolate and Raspberry Cookie Recipe


Another week, another bake! I hope your Easter was as lovely and chocolate-y as mine. My two weeks holiday is over now and it's back to uni for me today so I'm writing this as I enjoy(well not really)  a 2 hour journey, maybe the greenery in the distance will inspire me to write... Or just distract me.  

So this week's bake was a little rushed and not really thought through so it's not as exciting as I'd hoped but here it is... 


White Chocolate and Raspberry Cookies


Okay they're not quite the show stopping cookies I was hoping to photograph, I think I was a bit lazy this week (come on don't shame me for that we all have our lazy days)


These cookies are soft, chewy, chocolate-y, raspberry-y and very moreish (well for me anyway, think I have the biggest sweet tooth around!) and my Mum gave them a big thumbs up! 

Here is the how to:

Recipe adapted from allrecipes

Ingredients 

  • 100g Caster sugar 
  • 200g Dark brown soft sugar 
  • 170g Unsalted Butter (melted)
  • 1 Medium egg
  • 1 Egg yolk
  • 1 Tsp Vanilla extract 
  • 250g Plain flour
  • 1/2 Tsp Bicarbonate soda
  • 1/2 Tsp Salt 
  • 250g White chocolate (chunks or chips)
  • 75g Fresh raspberries (cut in halves)


Method 

  1. Preheat your oven to 170 Degrees C. Line and greaseproof a couple of baking trays. This mix makes a fair amount of cookies (around 20 depending on the size) so I usually bake them in batches.  
  2. Melt the butter and then cream together with the sugar in a large mixing bowl. Then whisk in the eggs and vanilla until creamy and paler in colour.
  3. In a separate bowl weigh out the flour, then sift in to the mix along with the bicarbonate soda and salt and combine.
  4. Gently stir in the chocolate and raspberries, the raspberries will break up a little bit but don't worry this will give more flavour to the cookies, you just don't want to let them completely mash up. (For the white chocolate I used bars and broke the pieces up into chunks).
  5. Spoon the cookie mix onto the tray, use around three tablespoons of mix per cookie. Obviously you can make them as big or as small as you like. Don't flatten the cookies as they will spread themselves when baking so make sure there's room for the cookies to spread (around 5 - 10cm depending on how big your making your cookies).
  6. Bake for 12 - 15 minutes until the outsides are starting to look toasted. Feel free to swap shelves and turn the trays round to give a more even bake. 
  7. when out of the oven leave the cookies on the trays for a few minutes before transferring to cooling racks otherwise they will fall apart, I suggest using a fish slice to remove the cookies from the trays as they are very delicate whilst they are warm. 


Happy baking!

Instagram - fashionablebake